Working with Results
Downloading & Previewing
How to access, preview, and download your converted documents
Expanding a completed file
Once a file finishes converting, its row on the dashboard becomes expandable. Click anywhere on the row to expand it and reveal the list of available assets.
Each asset shows its name, a badge indicating its type or status, and action buttons for preview and download.
Available assets
Completed files include some or all of these assets:
- Accessible HTML — The main converted output, tagged with a WCAG AA badge if fully compliant
- Original — Your uploaded source file
- ZIP Bundle — Everything packaged together for easy distribution
- WCAG Compliance Report — An Accessibility Conformance Report detailing every WCAG criterion that was evaluated
- Accessibility Checklist — An interactive checklist to guide you through any possible remaining issues
Downloading
Click any asset name to download it directly. You can also click the download icon on the right side of each asset row.
Previewing
Click the preview icon (eye) next to the Accessible HTML to open it in a new browser tab. The preview renders the converted HTML exactly as it will appear when opened in any browser.
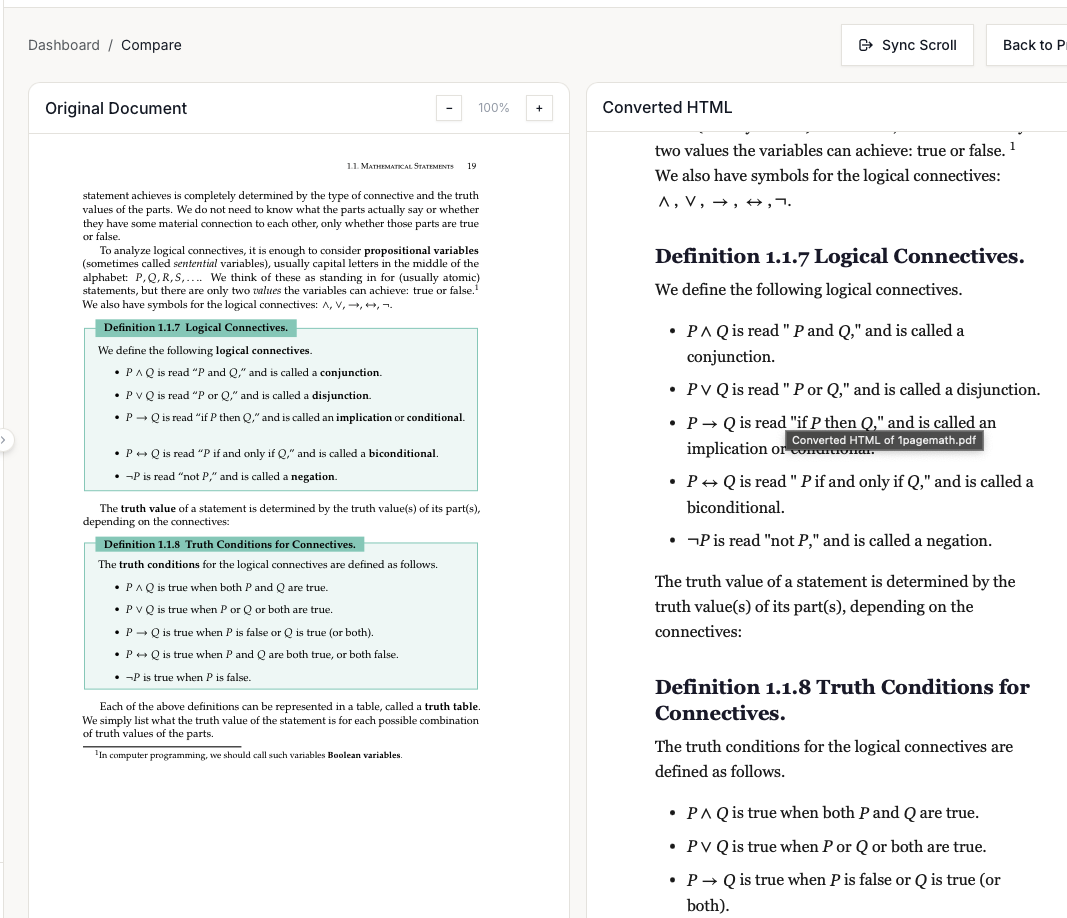
Compare view
For PDF and image uploads, a Compare link appears next to the HTML asset. Clicking it opens a side-by-side view:
- Left pane: The original document (rendered with a built-in PDF viewer)
- Right pane: The converted accessible HTML
Compare features
- Zoom controls — Adjust the original document zoom (50% to 200%)
The Compare view requires a screen at least 1024 pixels wide. On smaller screens, a message suggests using a larger display.
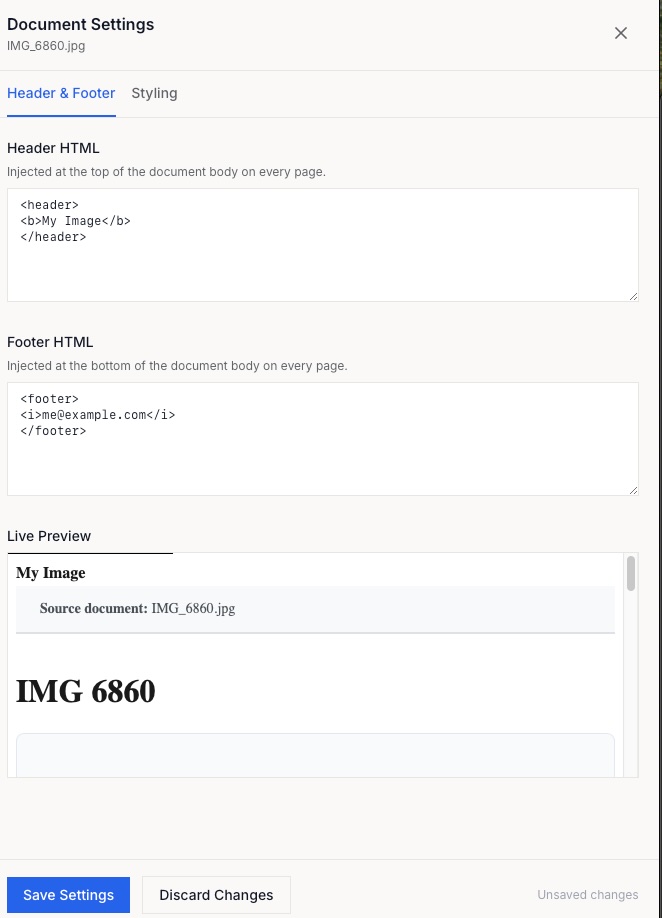
Document Settings
The Settings option in the file actions menu opens a panel where you can customize how the converted HTML looks and add your own branding. Settings are saved per document and applied every time the file is previewed or shared.
Header & Footer
Use the Header & Footer tab to inject custom HTML at the top and bottom of the converted document. This is useful for adding a company logo, document title, confidentiality notice, or page attribution that appears consistently across every page.
Enter any valid HTML into the Header HTML field — it is inserted immediately after the opening tag. The Footer HTML field works the same way, inserted just before . A live preview updates as you type so you can see exactly how the header and footer will look alongside your content.
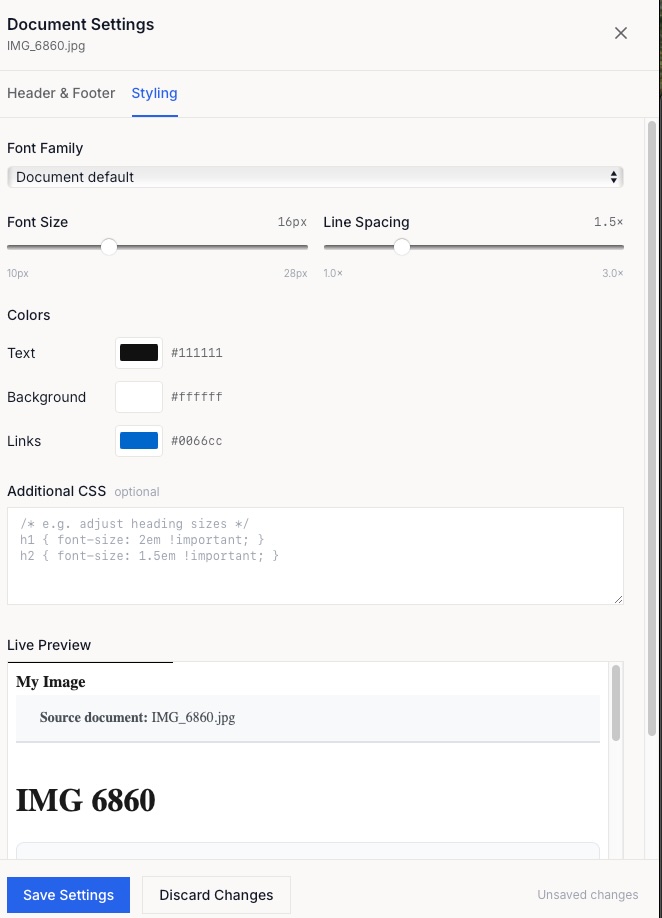
Styling
The Styling tab gives you control over the visual presentation of the converted HTML without writing CSS from scratch.
- Font Family — Choose from a set of web-safe typefaces (sans-serif, serif, readable, modern, or monospace) to override the document's original font. Select Document default to leave the font unchanged.
- Font Size — A slider from 10px to 28px lets you increase or decrease the base text size. The current value is shown alongside the slider.
- Line Spacing — Adjust line height from 1.0× (tight) to 3.0× (very open). Larger values improve readability for users with low vision.
- Colors — Set the Text, Background, and Link colors using a color picker. Each color shows its hex value and can be reset individually to the document's original color.
- Additional CSS — An optional free-form CSS field for any styling not covered by the controls above. Rules entered here are appended after the other style settings, so they can override anything.
All changes are reflected instantly in the live preview at the bottom of the panel. Click Save Settings to persist your choices, or Discard Changes to revert to the last saved state.
Sharing
Use the Share button in the file actions menu to generate a shareable link to the converted document. Recipients can view the HTML without needing an account.